
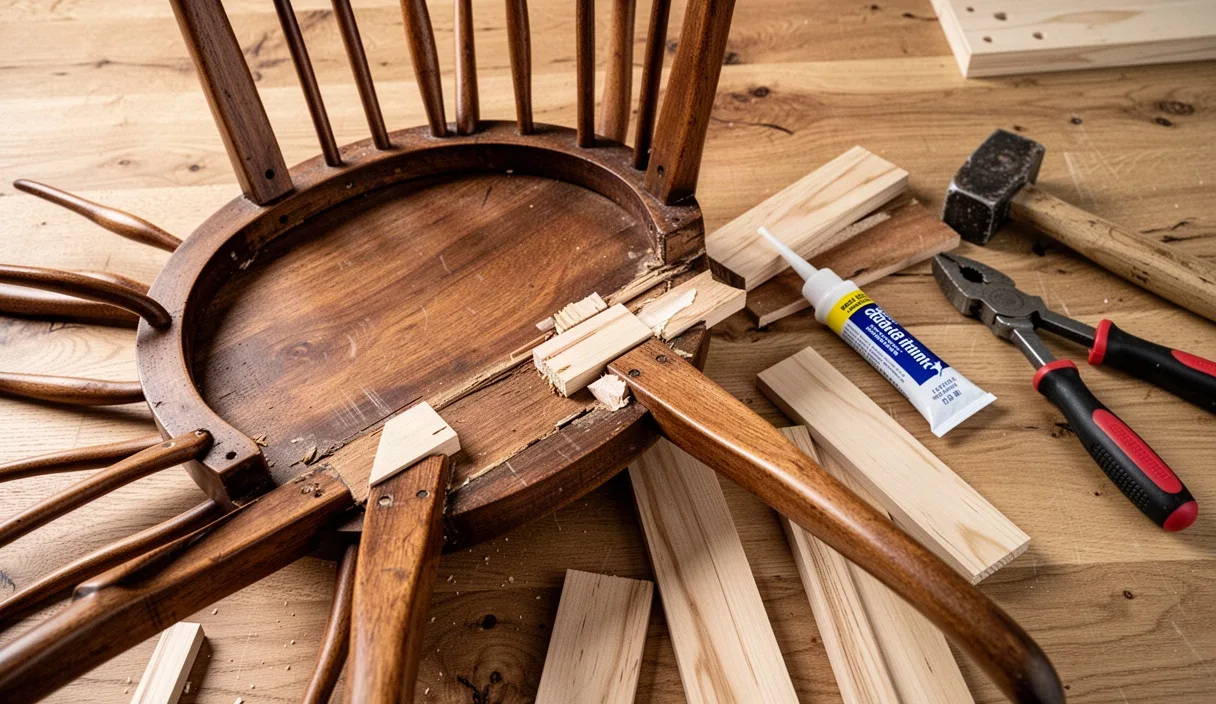

A wooden dining chair often announces its age with a discreet squeak before it begins an outright wobble. Because wood expands across its grain during humid summers and contracts during dry winter heating cycles, joints that left the factory snug eventually lose their mechanical lock. When that happens, the original glue line fractures, leaving tenons floating loosely inside mortises and rungs that spin when nudged with a toe. Rather than retiring a solid chair to the attic or hauling it to the curb, a careful afternoon of repair can restore its rigidity for decades of future service.
Most wobbles do not require complex workshop machinery or full joint reconstruction. When a tenon has lost just enough timber volume through compression and age to sit slack in its socket, inserting a thin wooden shim is the standard, durable remedy. By combining scrap wood veneer with modern polyvinyl acetate adhesive and simple strap clamping, you can pull the chair back into square and rebuild the internal pressure that keeps the framework stable under dynamic load.
Diagnosing Loose Rungs vs Uneven Leg Lengths
Before pulling out scrap wood and adhesive, you must confirm what is actually causing the movement. A chair can rock back and forth for two entirely different reasons: one leg is physically shorter than the others, or the structural joinery has loosened. Cutting or shimming joint mortises when the real issue is an uneven floor or a worn foot pad will throw the entire frame out of alignment.
Place the chair on a known flat reference surface. A cast-iron machine top, a solid stone kitchen island, or an engineered worktable works best, as standard subfloors often have gentle dips that mimic chair faults. With the chair resting on the surface, press down firmly on the center of the seat. If the chair sits still under direct central weight but twists or sways sideways when you apply lateral pressure to the backrest, the joinery is loose. If the chair tilts between diagonal corners even when weighted, you are likely dealing with an uneven leg length or a warped frame.
| Symptom | Primary Cause | Initial Test | Correct Intervention |
|---|---|---|---|
| Chair rocks on diagonal feet with zero lateral force | Uneven leg wear or warped stretcher | Slide a business card under each foot on a verified flat surface | Trim the high legs or add a felt leveling pad beneath the shortest foot |
| Rung rotates freely inside the leg socket | Glue bond failure and tenon shrinkage | Grip the rung by hand and twist along its long axis | Disassemble the joint, clear debris, and insert a lateral veneer shim |
| Backrest flexes backward with noticeable joint gap | Mortise wall displacement under levered stress | Apply gentle rearward force while watching the seat-to-back connection | Deep-clean the socket, shim both sides of the tenon, and clamp along the rail |
If you discover that a single rung spins freely while the adjacent legs stay planted, your repair path is clear. If several rungs and both rear legs shift simultaneously, the chair will need a full teardown of the lower stretcher assembly. Label each piece with low-tack blue painter tape so you return every rail to its original orientation during glue-up.
Clearing Out Brittle Crystallized Glue
Adhesive will not bond to ancient, powdery residue. Most older production furniture was assembled with hide glue or early synthetic formulations. Over forty years of seasonal movement, these glues dry out, crystallize, and turn into an inert powder that acts as a barrier to fresh glue. If you smear new adhesive over this chalky layer, the bond will break within three weeks of daily use.
Gently pull the affected joints apart. If a joint resists light manual pulling, tap it with a rubber mallet, striking a scrap block of pine placed against the rail to avoid denting the finished hardwood. Never strike the chair directly with steel or hard plastic. If the joint remains stubbornly locked on one side, do not force it, as you risk shearing the tenon clean off inside the leg. Repair the loose side in place if full disassembly risks breaking sound wood.
Once the mortise cavity and tenon tongue are exposed, clean them using mechanical rather than chemical means. Avoid pouring heavy liquid chemical strippers into end grain, as they saturate the wood fibers and prevent modern glues from curing properly. Instead, prepare the surfaces with these focused tasks:
- Scrape the tenon cheeks: Use the flat back edge of a sharp wood chisel or a stiff cabinet scraper to remove the crusty ridge of old adhesive until clean wood fibers appear. Keep the blade perpendicular to the wood to prevent shaving away good timber.
- Clean the mortise cavity: Use a narrow, square-ended rasp or a small dental pick to flick out hardened glue chunks resting at the bottom and corners of the hole.
- Abrade the interior walls: Wrap a strip of 80-grit aluminum oxide sandpaper around a wooden dowel that matches the mortise diameter, then twist it back and forth inside the hole to remove glazed residue.
- Remove the dust: Blow the cavity clear with a bulb syringe or vacuum it with a narrow crevice attachment. Residual dust prevents the glue from penetrating the grain.
Cutting Custom Shims from Scrap Veneer
A loose tenon is essentially a peg that has lost its friction fit. Shimming restores that friction by widening the tenon so it presses against the mortise walls under high mechanical pressure. Never use paper, cardboard, or plastic for this task, as these materials compress permanently under load and fail. Wood veneer, measuring between 0.6 mm and 1.5 mm thick, is the ideal material because it behaves identically to the surrounding components when humidity fluctuates.
Select scrap veneer of a similar hardwood density, such as maple, birch, or beech. The orientation of the grain is critical: the grain of your shim must run parallel to the grain of the tenon itself. If you cut a shim with cross-grain orientation, it will split along the grain line when pushed into the socket, bunching up at the back of the hole like an accordion and preventing the joint from seating fully.
Dry-fit the joint several times to calculate the thickness required. Insert the clean tenon into the socket. If it drops in with zero resistance and leans from side to side, you need a shim on each cheek. If it fits closely but lacks snugness, a single shim on the hidden inner cheek is sufficient. Cut your shim slightly longer than the tenon cheek, allowing roughly 5 mm to protrude past the joint line during assembly. You will trim this excess flush once the adhesive dries.
Taper the leading edge of the shim slightly using a block plane or 120-grit sandpaper. By feathering the front edge down to a wedge profile, the shim will enter the mortise without catching on the rim of the hole or tearing the internal fibers as you drive the pieces home.
Applying Modern Polyvinyl Acetate Glue
When selecting an adhesive for interior chair repairs, standard Type I or Type II polyvinyl acetate (PVA) wood glue is the most reliable choice. Type II PVA offers modest moisture resistance, which helps if chairs sit near open dining room windows or encounter occasional spills. Avoid expanding polyurethane adhesives for loose chair joints; while polyurethane expands into voids, that foamed glue has negligible structural shear strength. If a joint relies on foamed glue to bridge a gap, it will loosen under dynamic human weight.
PVA glue operates by creating microscopic mechanical interlocks within the porous cellular structure of raw wood. To get a strong bond, you must coat every mating surface: the tenon cheek, both faces of your veneer shim, and the internal side walls of the mortise. However, avoid flooding the bottom of the mortise hole. In round or blind mortises, excessive glue pooling in the bottom can cause hydraulic lock, preventing the tenon from sinking to its full depth no matter how much clamping force you apply.
Follow a deliberate sequence during the application phase:
- Apply a thin, even ribbon of glue to the interior walls of the mortise using an acid brush, a clean pipe cleaner, or a thin craft stick.
- Spread glue across both sides of your shaped veneer shim, ensuring the wood is wetted without dripping.
- Position the shim against the tenon cheek, allowing the tapered end to wrap slightly over the leading nose of the tenon.
- Slide the combined tenon and shim assembly smoothly into the mortise with steady, firm hand pressure.
You have an open assembly time of roughly 8 to 12 minutes at room temperature before standard PVA begins to set. Work deliberately. If the shim bunches up or jams partway, pull the joint apart immediately, wipe away the wet glue with a damp cloth, and check your clearances before trying again.
Using Ratchet Straps for Even Clamping Force
Clamping a dining chair is notoriously awkward. Legs flare outward at subtle compound angles, stretchers sit at varying heights, and standard iron bar clamps slip off curved surfaces, leaving heavy dents in the wood. Ratchet cargo straps, commonly sold for securing luggage or pickup truck beds, solve this geometry puzzle by wrapping the perimeter of the chair and drawing all four legs inward with balanced, simultaneous force.
Before tensioning the strap, you must protect the finished show surfaces of the timber. The heavy steel ratcheting mechanism and stiff polyester webbing will easily crush delicate edges and leave indelible marks in lacquer. Cut four corner pads from corrugated cardboard, folded moving blankets, or scrap leather. Place these buffers between the webbing and each chair leg before applying any mechanical pressure.
Position the strap around the legs at the precise height of the loose rungs. If the rungs sit low near the floor, keep the strap low. If the loose rails sit immediately below the seat, run the strap just under the seat perimeter. For complex frames with rungs at two distinct levels, use two independent straps to avoid pulling the legs out of plumb.
Crank the ratchet handle slowly, monitoring the movement of the joints as the strap tightens. Watch the tenon shoulder close against the mortise face. A thin, continuous bead of glue should squeeze out around the entire perimeter of the joint. If the bead squeezes out on only one side, the rung is seating at an angle. Adjust your strap position slightly upward or downward to rebalance the vector of pull. Wipe away the bulk of the squeezed-out adhesive with a clean cloth wrung out in warm water, taking care not to push wet glue deeper into the surrounding raw pores.
Trimming Flush and Checking for Level Ground
Leave the chair in the ratchet harness for at least 12 hours, and preferably a full 24 hours to let the adhesive reach maximum tensile strength. Once the drying time has elapsed, release the ratchet pawl, remove the webbing, and inspect the joint line. That protruding 5 mm tab of veneer shim you left during insertion will now be locked solidly against the tenon.
Trim the shim flush with the surface of the leg or seat rail. A Japanese flush-cut pull saw with flexible, un-set teeth is ideal for this cut, as the blade can lay flat against the finished wood without gouging the varnish. Alternatively, use a broad, razor-sharp bench chisel with the bevel facing upward. Take light, slicing cuts across the end grain of the shim until it rests completely level with the adjacent wood. A quick touch with 220-grit sandpaper wrapped around a hard cork block smooths the transition, ready for a dab of matching stain or clear wax.
With the structure rigid, carry out a final leveling check. Place the chair back onto your confirmed flat reference surface. Without anyone sitting in it, test each corner for movement. If you notice a minor lift at one foot, you can fine-tune the stance by placing a sheet of 120-grit sandpaper on the flat surface, abrasive face up. Rest the high legs on the paper and slide the chair back and forth three or four times with downward pressure. This removes minuscule increments of wood from the high spots without changing the visible profile of the foot.
Common Mistakes to Avoid
Even a straightforward joinery repair can go wrong if you take shortcuts that compromise the mechanical integrity of the wood. Steer clear of these frequent repair errors:
- Driving screws through the joint: Inserting drywall or wood screws through the outside of a leg into a loose rung is the most common destructive shortcut. Screws split old, brittle wood, provide very little holding power in end-grain fibers, and make future proper restoration far more difficult.
- Using fast-setting five-minute epoxy: While epoxy fills gaps, rapid-cure epoxies remain rubbery and have low peel strength. If you choose epoxy over PVA, use a slow-curing structural epoxy that allows deep penetration into the wood grain.
- Failing to test clamp setups: Always run a dry test with your ratchet straps before spreading any glue. Finding out that your straps are tangled or that your corner protectors slip while glue is rapidly setting creates unnecessary panic.
- Over-tightening the ratchet: Ratchet straps can exert tremendous force. Cranking the lever too aggressively can bend splayed legs inward, crack the delicate joints on the opposite side of the chair, or bow the stretchers. Stop ratcheting the moment the joint shoulder sits flush against the leg.
Practical Next Steps for Chair Maintenance
Once your chair is solid, take half an hour to inspect the remaining chairs in your set. Where one rung has loosened, others from the same production run and environment are usually close behind. Catching a joint while it has slight play prevents the mortise from ovalizing, which happens when loose tenons hammer the interior wood fibers under repeated sitting.
Equip each foot with heavy-duty wool felt pads attached with small mechanical cup screws rather than simple adhesive stickers, which slide off when dragged across hard floors. Finally, store your scrap veneer cutoffs in a labeled envelope along with your roll of painter tape and corner protectors. Having the right thicknesses of hardwood already trimmed makes the next seasonal chair repair a quick task rather than a weekend chore.