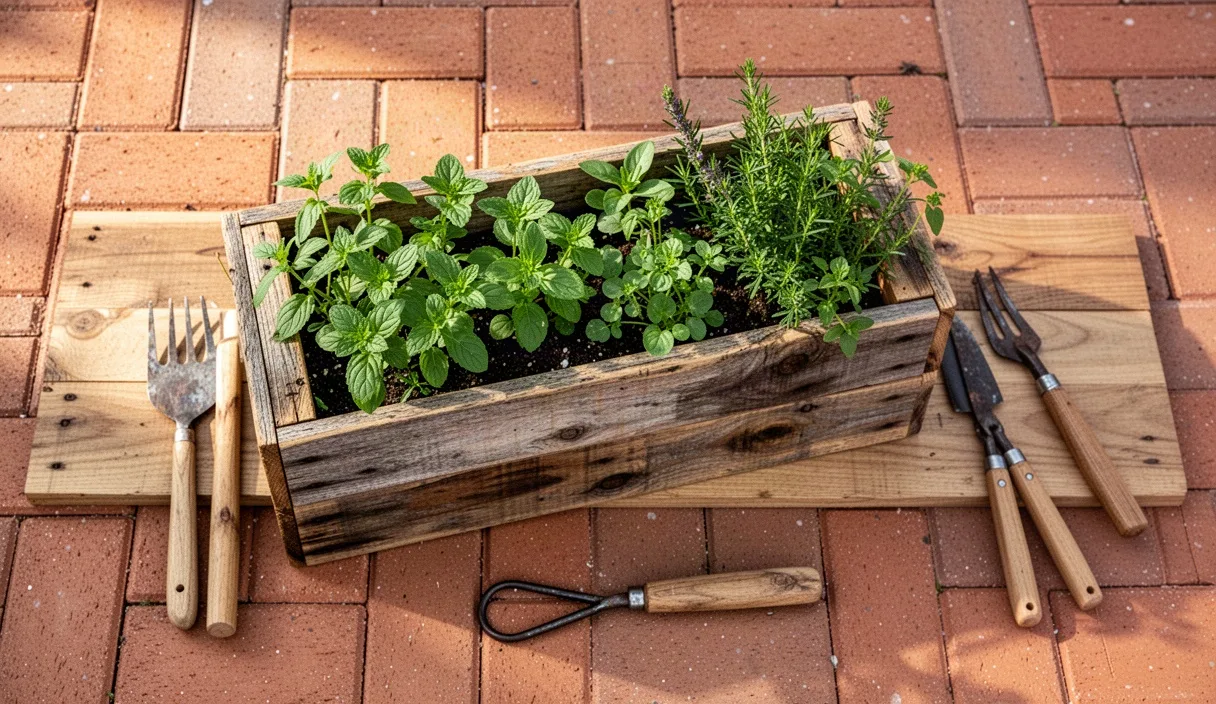

Wooden shipping pallets sit behind garden centres, distribution hubs, and construction yards, often free for the hauling. Converting these discarded industrial frames into planter boxes keeps useful timber out of the municipal waste stream and yields rugged, weather-hardy containers for herbs, trailing flowers, or root vegetables. Reclaimed pallet timber possesses a weathered patina that newly milled retail pine cannot duplicate, and the thick deck boards handle wet soil well when properly prepared.
Working with scrap shipping stock requires careful material selection and methodical prep work. Pallets endure industrial transit, rain exposure, forklift tines, and chemical sanitisation before reaching the salvage pile. Building a planter that lasts several growing seasons requires identifying safe boards, extracting fasteners without shattering dry wood fibres, and choosing construction details suited to wet dirt.
Reading Stamp Codes for Chemical Safety
Every pallet intended for international transport carries an official International Plant Protection Convention (IPPC) stamp, often called the wheat stamp. This mark resembles an ear of wheat inside a rectangular border alongside letters and numbers that record the pallet manufacturer country, regional registration number, and treatment method. If you plan to grow edible plants such as lettuces or carrots, confirming how the wood was sanitised is an essential safety precaution.
Look directly at the central stringers or corner blocks to locate the branded or stencilled mark. Heat treatment is the global standard for clearing insect pests from raw timber. Pallets processed in high-heat kilns carry the abbreviation HT. Kiln-dried timber marked KD undergoes a similar thermal cycle that drops internal moisture content below nineteen percent. Both HT and KD lumber contain zero synthetic residual poisons, making them safe for vegetable gardening and soil contact.
Avoid any pallet bearing the initials MB, which indicates methyl bromide fumigation. Methyl bromide is a broad-spectrum pesticide used in specialized quarantine settings. Although many countries have phased it out under international environmental protocols, older or cross-border maritime pallets marked MB still surface in freight yards. Do not burn, sand, or build planters from MB-stamped lumber. Pallets without any visible stamp belong in non-food yard projects at most, as their operational history cannot be verified.
| Stamp Code | Processing Method | Suitability for Food Planters |
|---|---|---|
| HT | Heat treated (heated to 56°C core temp for 30 minutes) | Safe for vegetables and ornamentals |
| KD | Kiln dried to reduce moisture under 19 percent | Safe for vegetables and ornamentals |
| DB | Debarked (supplemental mark confirming bark removal) | Safe when paired with HT or KD |
| MB | Methyl bromide chemical fumigation | Unsafe; do not use for planters |
Check the surface condition alongside the code. Pallets stained with blue or red industrial paint often belong to rental pools such as CHEP or LPR. Aside from containing chemical pigments, these painted pallets remain the legal property of their respective logistics firms. Stick to unpainted natural softwood pallets marked HT or KD with clear regional registry codes.
Dismantling Pallets Without Splitting Planks
Pallet factories do not construct their frames with easy disassembly in mind. They secure deck boards using hardened, spiral-shanked or ring-shanked nails that grip wood fibres like structural barbed wire. Attacking these boards head-on with a standard framing hammer or crowbar almost always snaps dry pine across the grain, turning a useful eighty-centimetre plank into kindling.
The cleanest dismantling method bypasses prying entirely: cut the nails between the deck board and the underlying stringer using a reciprocating saw. Slide a long bi-metal or carbide-tipped demolition blade into the seam where the top plank meets the 2x4 rail. Run the saw at medium speed with light forward pressure. The blade shears through the soft steel nails in seconds without bruising the top surface of the timber. Once the boards release, drive the remaining nail shanks out through the back of each board using a punch and a small ball-peen hammer.
If a reciprocating saw is not on hand, dismantle the joint using leverage and wooden cushions. Slide a flat pry bar beneath the board directly above the stringer. Slip a wedge of scrap timber underneath the heel of the pry bar to distribute force across the whole runner rather than crushing the edge of the plank. Lift the board evenly by working from both edges toward the centre: pry five millimetres on the left side, five millimetres on the right, and then clear the middle nail. Never yank a board free from one end while the opposite side remains anchored.
Dimensioning and Trimming Usable Timber
After separating the components, inspect the planks under bright light. Pallet wood tends to split directly around old nail holes, and the ends often harbour grit, stone chips, or bent staple legs that will ruin the carbide teeth of a fine hand saw or circular saw blade. Scrub dirty surfaces with a stiff nylon wire brush, then check each board with an inexpensive handheld metal detector or run a strong neodymium magnet over the faces to pinpoint buried fastener fragments.
Plan out consistent dimensions for your box based on the natural yield of your haul. A practical rectangular patio planter uses four long side slats, four short end slats, two corner support posts, and two to three bottom boards. A dependable, easy-to-manage size for patio greens is 600 millimetres long, 350 millimetres wide, and 280 millimetres deep. Group boards by thickness: pallet deck boards often range between 15 millimetres and 22 millimetres within the very same unit.
- Squaring the ends: Cut off the split ends of each board, taking off roughly 25 to 40 millimetres to remove fragile fastener zones.
- Uniform sizing: Cut all opposing wall pieces using a stop block on a miter saw or a clamped guide fence for a hand saw. Variations of even two millimetres will create crooked corners and light gaps.
- Corner corner posts: Split the thick pallet stringers or cut four internal upright cleats measuring 38 millimetres square. Cut their length five millimetres shorter than the final internal box depth so they do not protrude above the top rim.
Sand the cut stock lightly using 80-grit abrasive paper wrapped around a wood block. The goal is not a glossy furniture finish, but rather clearing splintered fibres, rough mill marks, and transit grime that snag garden gloves during daily watering.
Fastening Corners with Exterior Screws
Pallet timber is typically air-dry and dense near the surface, meaning screws driven directly into the wood without pilot holes will split the grain clean out to the edge. Never assemble wet-soil containers with smooth common nails or standard interior drywall screws. Drywall screws are brittle, snap under shear load, and corrode into black rust within months when exposed to damp compost.
Use exterior-grade woodscrews finished with ceramic or polymer coatings rated for outdoor exposure, or use grade 304 stainless steel screws. For securing twenty-millimetre deck boards into 38-millimetre corner cleats, select screws measuring 4.0 millimetres in diameter by 45 millimetres in length. Coarse, deep threads bite securely into soft pine without tearing the inner wood grain.
Drill every pilot hole with a 3.0-millimetre twist bit equipped with a countersink cutter. Position your screw lines at least 15 millimetres inward from the board ends. Drill through the face board and slightly into the structural upright. Drive two screws per plank at each corner. For boards wider than 100 millimetres, drive three screws in a vertical line to prevent the timber from cupping as it absorbs moisture from wet soil.
Assemble the planter by fastening two long planks to two corner cleats to make the front panel. Repeat the process to produce the rear panel. Then, clamp the two panels upright on a flat workbench and join them by screwing the side slats directly into the exposed edges of the cleats. Check the diagonal measurements with a tape measure: if corner-to-corner measurements match within three millimetres, the box sits square.
Drilling Drainage Ports and Installing Liners
Waterlogged soil compacts roots, excludes oxygen, and encourages fungal rot. Even the thirstiest tomato or squash plant requires open water escape ports at the lowest point of the frame. Pallet wood will deteriorate prematurely if forced to sit in stagnant puddles inside the container.
Invert the planter to work on the floor boards. Fix the floor slats leaving a four-millimetre expansion gap between each plank, as wet timber expands across its width during rain. Using a 12-millimetre or 16-millimetre spade bit, drill drainage ports through the floor boards every 120 millimetres. Chamfer the exit side of the holes slightly with a utility knife to clear hanging wood burrs that could snag roots or retain pooled runoff.
Line the box interior to prevent fine potting soil from washing out through the seams while letting surplus water exit freely:
- Select the liner fabric: Use non-woven geotextile landscaping fabric. Avoid solid polythene sheeting, which traps moisture against the inner face of the boards and creates an anaerobic reservoir at the base of the root zone.
- Cut the fabric: Measure the interior dimensions, adding 60 millimetres of overhang for every wall face. Cut the sheet as a single piece with an X-shaped cut pattern at the internal corners to avoid bunching.
- Staple in place: Press the fabric tight against the inner floor and corner joints. Secure it to the interior wood walls using heavy-duty stainless or galvanised T50 staples spaced 75 millimetres apart. Position the staple line 25 millimetres below the top timber lip so the fabric stays hidden from view once soil is added.
- Perforate the base: Locate the drilled drainage holes from underneath the box and use an awl to pierce the fabric directly over each port.
Applying Natural Linseed Oil Protection
Unprotected softwood exposed to cycles of damp potting mix and summer sunshine will warp, crack, and succumb to fungal rot in two to three seasons. Standard exterior polyurethane paints form a surface plastic film that eventually cracks, trapping water beneath the coating. Natural drying oils penetrate deep into the pores, repelling external moisture while letting the timber breathe.
Raw linseed oil is pressed from flax seeds and contains zero synthetic additives, making it safe for organic garden boxes. Boiled linseed oil support faster because manufacturers add heavy-metal dryers, such as manganese or cobalt, which makes it less ideal for edible herb containers. Raw linseed oil takes longer to dry, typically requiring several days between coats in warm air, but provides food-safe, water-resistant preservation.
Brush raw linseed oil liberally onto all exterior faces, end grain sections, and the bottom floor planks. Pay special attention to cut ends: the cross-cut cell structure absorbs oil like a bundle of drinking straws. Apply a generous flood coat, let it soak in for thirty minutes, and then wipe off any tacky, unabsorbed residue with a clean cotton rag. Allow the first coat to support three days before brushing on a thinner second coat.
Linseed oil support through an exothermic oxidation reaction that produces heat. Discarding oil-soaked rags in a crumpled pile inside a garage or bin presents a genuine risk of spontaneous combustion. Always submerge used rags in a metal bucket filled with water immediately after application, or spread them completely flat across concrete outdoors to dry stiff before binning them.
Common Mistakes
- Overlooking hidden staples: Pallet firms often staple tracking labels to stringers. Leaving tiny wire shanks in place chips planer blades and circular saw teeth.
- Using thin drywall screws: Black phosphate drywall screws lack shear strength and will snap off at the head when the swollen wet timber expands in the winter.
- Filling with backyard topsoil: Garden soil is too dense for small planter boxes, turning into a brick-like slab that clogs drainage holes. Use formulated potting mix lightened with perlite or vermiculite.
- Resting the box flat on damp soil: Sitting the timber bottom directly on moist ground draws up water via capillary action, rotting the base within two years.
Assembly and Planting Next Steps
Raise your finished planter box slightly above the patio, deck, or path. Screw four square offcuts from the pallet stringers underneath the corners to serve as feet. This two-centimetre air gap guarantees that water draining through the fabric ports drips clear away rather than soaking into the floor slats.
Fill the lined box with a light, nutrient-rich potting medium: a mix of roughly two parts mature compost, two parts coco coir or peat moss, and one part coarse perlite provides drainage and water retention for shallow-rooted vegetables. If building large boxes exceeding 1200 millimetres in length, consult an engineer or structural manual before placing them on elevated residential balconies, as saturated soil weighs roughly 1.6 kilograms per litre. Brush a fresh coat of raw linseed oil onto the external timber every spring to maintain the wood against the elements for seasons to come.