
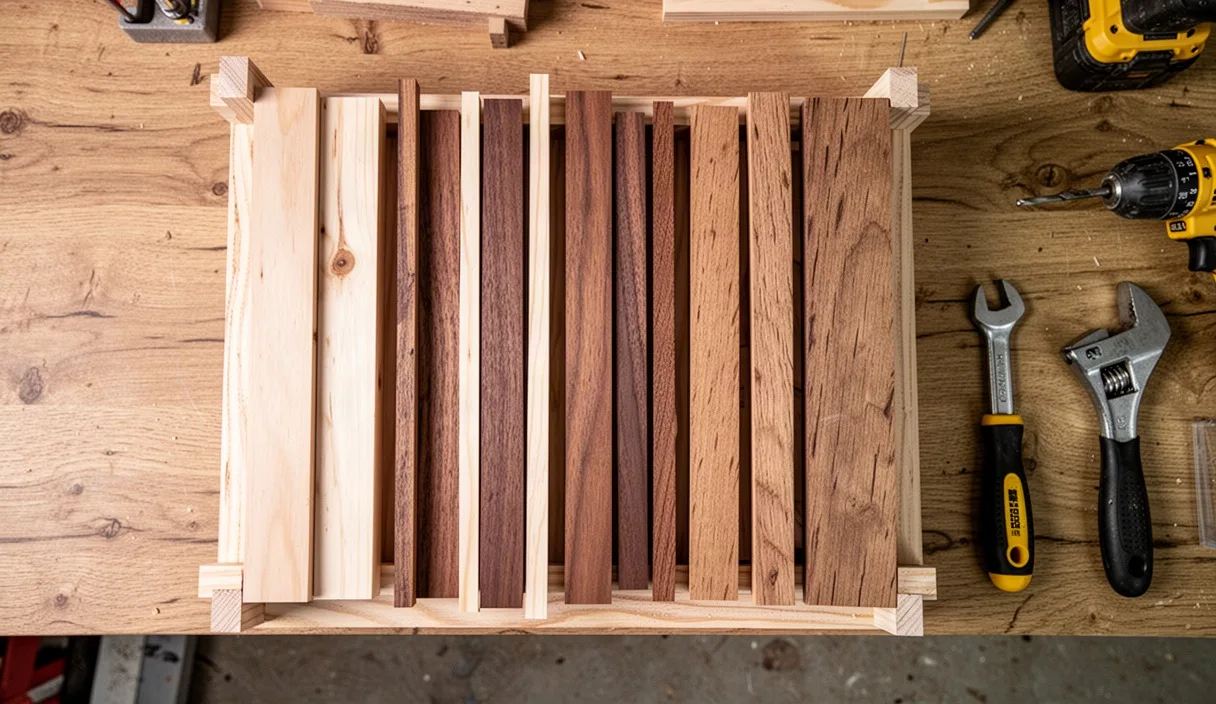

Every woodworker knows the quiet guilt of looking at a six-inch piece of walnut and thinking, just maybe, that it will make the perfect spline or wedge three years from now. In a compact garage or basement workshop, this instinct quickly turns floor space into an obstacle course. Piles grow against walls, board ends poke into walkways, and short blocks end up buried under piles of sawdust beneath the miter saw stand.
Hoarding offcuts without an intake system also creates genuine safety risks. Stacking loose lumber haphazardly leads to trip hazards, unstable leaning towers, and fire loads that outstrip what a small shop extinguisher can handle. Sorting your wood scraps by dimension, composite hazard, and species turns that chaotic pile into a usable, safe inventory that protects both your lungs and your fingers.
Assessing Cutoff Utility by Dimension
The first rule of scrap management is setting strict dimensional cutoffs before a single board touches the bin. If a piece cannot be safely fed through a table saw, held against a bandsaw fence, or gripped in a vise without placing your hands within four inches of a spinning blade, it should either be converted into an immediate small project or discarded. Keeping every triangular offcut creates clutter that hides genuinely useful stock.
For solid lumber, a practical lower limit for general furniture makers is 300 mm in length and 50 mm in width. Anything shorter than 300 mm becomes difficult to joint or rip safely on stationary machines without specialized sleds and push blocks. If your work focuses on small boxes, wooden utensils, or toy making, you can drop that threshold to 150 mm in length, provided you store these small pieces separately from structural timber.
Sheet goods follow a different dimensional logic based on standard cabinet parts. Thin strips of plywood narrower than 75 mm rarely serve a structural purpose and are prone to bowing along their length. Large panel cutoffs, however, should be evaluated against standard internal furniture dimensions such as drawer bottoms and cabinet backs:
- Large panels (above 400 mm by 400 mm): Ideal for shop jigs, router templates, and small utility shelving. Store flat or vertically supported to avoid warp.
- Narrow sheet strips (75 mm to 200 mm wide, over 600 mm long): Useful for drawer sides, cleat systems, and face frames. Group these in upright vertical slots.
- Block cutoffs (under 150 mm on all sides): Keep only if defect-free and made from high-grade Baltic birch or dense hardwood. Useful for corner braces, setup gauge blocks, and bench dogs.
Identifying Treated Timber, MDF, and Plywood Hazards
Not all wood scrap poses equal risk. Introducing construction lumber or engineered panels into a scrap bin requires careful sorting because the binders, preservatives, and glues present respiratory and environmental risks when processed further.
Pressure-treated lumber contains chemical biocides, historically chromated copper arsenate (CCA) in older stock and copper azole or alkaline copper quaternary (ACQ) in contemporary stock. These chemicals protect wood against rot and insects outdoors, but fine particulate dust from treated stock can severely irritate respiratory pathways and eyes. Treated scrap should never be used for indoor projects, indoor storage bins, cutting boards, or shop fixtures that contact hand tools regularly.
Medium-density fiberboard (MDF) and standard interior plywood use synthetic resins, frequently based on urea-formaldehyde. When machined, MDF produces exceptionally fine airborne dust that stays suspended in workshop air longer than solid wood sawdust. Furthermore, sheet scrap that has accumulated moisture can delaminate and harbor mold in cold workshops. Segregating these materials into dedicated bins prevents composite dust from contaminating clean solid hardwood offcuts that might otherwise be used for food-contact items or clean woodturnings.
| Material Type | Common Treatment or Binder | Primary Hazard | Recommended Action |
|---|---|---|---|
| Treated Construction Pine | Copper Azole, ACQ, or legacy CCA | Chemical toxicity from airborne dust | Reject from indoor scrap bin; dispose via municipal solid waste |
| Medium-Density Fiberboard (MDF) | Urea-formaldehyde or polymeric resins | Extremely fine respirable dust and gas release | Store in covered dry slot; machine only with high-efficiency dust collection |
| Interior Plywood | Phenol-formaldehyde or urea glues | Irritant dust and sharp edge splinters | Sort by core grade; keep away from outdoor or high-moisture use |
| Untreated Solid Hardwood | None (natural lignin and resins) | Wood dust exposure, species-specific allergies | Keep clean, dry, and labeled for reuse or turning |
Building a Modular Scrap Bin on Wheels
A static scrap pile against a shop wall collects sawdust, traps lost tools, and blocks access to electrical outlets. A mobile cart with a footprint of roughly 600 mm by 900 mm lets you roll your offcut storage out of the way when sweeping or maneuvering large sheet goods around the table saw.
To construct a practical mobile cart, use a single sheet of 18 mm structural plywood for the base and primary uprights. Equip the base with four heavy-duty swivel casters rated for at least 60 kg each, ensuring at least two casters have positive foot brakes. An overloaded scrap cart is surprisingly heavy; undersized rubber wheels will flat-spot under the load within a couple of months.
Organize the cart layout to keep weight balanced over the wheelbase:
- active vitality the main vertical divider: Fasten an 18 mm plywood panel vertically down the center of the base, slightly offset toward one side to create a deep side for sheet scraps and a compartmentalized side for boards.
- Partition the board side: Install two horizontal shelves and several vertical dividers spaced 150 mm to 250 mm apart. This prevents long boards from leaning at steep angles and kicking the cart sideways.
- Mount side totes for short pieces: Screw removable plastic bins or shallow wooden trays to the short ends of the cart. These catch short turning blocks, dowels, and wedge offcuts so they do not settle at the bottom of long slots.
- Cut side inspection ports: Cut round or oval holes in the outer panels using a hole saw or jigsaw. These cutouts reduce the weight of the cart and let you spot shorter boards that have slipped down without having to pull out every upright stick.
Labeling Systems for Hardwood Species
A board rough-sawn on the bandsaw often looks radically different from its surfaced counterpart. Freshly cut ash, hard maple, and hickory can be deceptively hard to differentiate under fluorescent shop lighting when covered with a thin film of dust. Leaving cutoffs unmarked leads to frustrating mistakes during glue-ups, where pieces with different expansion rates, hardness, or finishing characteristics are accidentally joined together.
Avoid using permanent markers directly on the face of valuable stock, as ink can penetrate through several millimeters of open-pored woods like red oak, walnut, or mahogany, requiring extra planing later. Instead, implement one of these reliable shop methods:
Lumber crayons, also known as keele markers, use a dense wax or clay base that marks rough, wet, or dry wood cleanly without deep bleed. Mark the end grain of the cutoff immediately after making the cut on your miter saw or table saw. Because the end grain is trimmed off during final project squaring anyway, the mark stays out of your final surface work.
For fine cabinet hardwoods, maintain a simple color-coding system on the cart itself. A row of colored adhesive dots on bin dividers corresponding to a colored chalk stroke on the board edge allows you to return pieces to their exact location in seconds. Marking the board thickness (such as 4/4, 5/4, or exact metric millimeter depth) directly next to the species initial saves you from repeatedly reaching for a digital caliper when looking for matching stock.
Safe Small-Piece Storage for Turning and Carving
Woodturning and hand carving use scrap pieces that flat-board woodworkers would consider firewood. Spindle blanks measuring 50 mm by 50 mm by 150 mm make excellent tool handles, finials, or small bud vases. However, throwing these dense, heavy chunks into standard board bins creates a jumble that chips sharp edges and ruins dry wood.
For carving and turning blanks, moisture control is critical. Green wood cutoffs intended for spoon carving or green spindle turning must be isolated from kiln-dried furniture scraps. Storing green wood in an airtight plastic tub encourages surface mold and sour rot within two weeks. Instead, keep green blanks in breathable wire baskets or open-weave milk crates, off the concrete floor, and seal the end grain with paraffin wax or commercial end-grain sealer to prevent deep checking as they equilibrate.
Store dry, valuable carving blocks in stackable, clear-front modular utility containers mounted to French cleats or wire shelving units. Group them strictly by dimension:
- Pen and small spindle blanks: Square stock between 15 mm and 30 mm square, organized upright in divided transparent organizers.
- Bowl and vessel blocks: Heavy segments over 100 mm square, kept on lower open shelves where their weight cannot deform plastic organizers or tip a hanging bin.
- Tool handle stock: Dense hardwoods (such as ash, hornbeam, hickory, and hard maple) stored horizontally in dedicated trays so their grain direction remains obvious at a glance.
Disposal Protocols for Contaminated Offcuts
Inevitably, some scrap cannot be reused. Knowing how to dispose of unusable scraps safely keeps your shop clean without releasing toxic compounds into your home or neighborhood. Wood treated with preservatives, wood composites bound with adhesives, and scraps coated with finishes require deliberate disposal paths.
Under no circumstances should treated lumber, MDF, particleboard, or finished stock be burned in a shop wood stove, fireplace, or outdoor fire pit. Burning pressure-treated lumber vaporizes toxic metals and distributes them in smoke, leaving high concentrations of hazardous compounds in the ash. Burning composite panels like MDF and plywood releases formaldehyde, cyanide-related compounds, and dense particulate smoke that rapidly coats chimney flues with unburned resin.
For contaminated scraps, use the following disposal steps:
- Separate clean firewood from contaminated scrap: Only untreated, unpainted, non-glued solid timber offcuts should ever go into kindling bins for home heating.
- Cut down bulky composite offcuts: Break down large sheets of unusable composite material to fit directly inside standard municipal waste bins. Use a coarse, low-cost blade to avoid dulling your best joinery blades on abrasive glue lines.
- Label chemical-saturated scraps for hazardous pickup: Wood soaked with oils that dry through oxidation, such as boiled linseed oil or oil-modified polyurethanes, carries a risk of spontaneous combustion if piled together. Lay soaked cutoffs flat on concrete outside until fully cured and hard before binning them.
- Contact your municipal authority: When clearing out large quantities of legacy pressure-treated decking or old painted lumber that might contain lead, consult your local waste transfer station for designated construction and demolition waste drop-off protocols.
Common Mistakes
The most frequent error in small workshop scrap management is keeping pieces that fall below your personal threshold of safe handling. Storing narrow slivers of wood that measure less than 10 mm in thickness or 100 mm in length might seem frugal, but searching through bins clogged with splintered stock wastes valuable shop time and exposes hands to puncture wounds.
Another common mistake is placing scrap bins directly on bare concrete slabs. Concrete wicks ground moisture through capillary action, transferring water directly into the end grain of vertically stored boards. Within a few months, the bottom two inches of your most valuable hardwood boards can swell, stain, and develop internal checks that make them unusable for joinery.
Finally, avoid storing finished scrap alongside raw wood. A cutoff with an existing coat of polyurethane, conversion varnish, or exterior paint looks like bare wood from the edge, but feeding it through a thickness planer can chip carbide knives or cause uneven friction against feed rollers.
Setting Up Your Scrap System This Weekend
Tackling an accumulated scrap pile does not require shutting down your shop for a full week. Start with a decisive sort into three immediate piles: clean solid hardwood, clean composite sheet goods, and garbage. If a board has sat untouched in the corner for twelve months and has no defined project attached to it, designate it for the kindling box or municipal bin immediately.
Once the floor is clear, verify that every board you keep is cut clean on at least one end and marked with its species and thickness using a wax crayon. Keep your cart design simple, use sturdy casters, and elevate any static wood storage at least 50 mm off concrete floors. A well-ordered scrap system costs very little to build, but it pays immediate dividends in open floor space, cleaner air, and fewer wasted hours spent hunting for that one specific block of wood.